

Friday, 4 October 2013
Here Is Terry
Haven't posted anything in a while, so here is vector Terry. Done as a design for a website and just fooling around.

Sunday, 23 June 2013
XBMC Ball Streams
A while back I posted about XBMC Hockey Streams and the plugin I developed in Python for XBMC. Well that project is still ongoing thanks to over 1,500 downloads, but say hello to it's sibling XBMC Ball Streams delivering the same experience from BallStreams.com if your a fan of basketball and XBMC this is the plugin for you!

Sunday, 28 April 2013
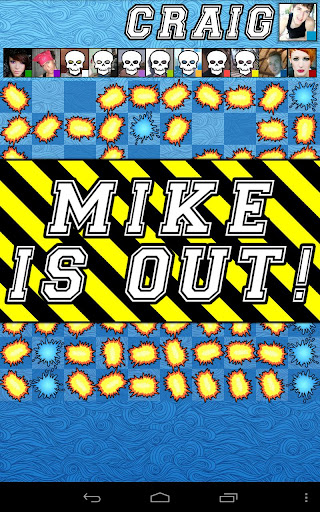
BattleShots Drinking Game Reaches 2K Downloads
Hurrah! BattleShots Drinking Game has reached a milestone of 2,000 user downloads. Some of the feedback received has been great, at some point there will be more features to come but thanks to all who have downloaded, played, shared and got merry with BattleShots Drinking game.
Saturday, 26 January 2013
BattleShots Game Architecture
Introduction
The implementation of BattleShots is a little more complex than the standard android practice of creating an XML based layout and attaching events to components. To achieve a customised UI which can match a theme we have control of, we need to take charge of all drawing. This in turn severely limits the use of built in widgets for the android framework as they generally are themed with the OS version or skin in mind. Whilst they do provide theming support such as color, border, background etc. we still cannot achieve the majority of styles we want to expose from our game UI mockups.
In steps OpenGL which is the most heavily used 2d/3d graphics API at this time. Android contains a flavour of OpenGL in the form of OpenGL ES 1.0 and OpenGL ES 2.0 (ES stands for Embedded-Systems) which is optimized for mobiles, pda's and game consoles etc.
From android version 1.0 OpenGL ES 1.0 has been available. As of version 2.2 (froyo) OpenGL ES 2.0 has been available. Both make use of hardware acceleration where devices have separate GPU's which make the API very quick allowing games to achieve 60 FPS rendering (the more frames the better).
Seeing as we wanted BattleShots to be a rich UI experience we needed to go this route or our UI would be very static.
Game Architecture
Down to the mechanics of it! It is generally bad practice in any coding circle to perform application logic in the UI thread (unless it's short lived). For example you dont want to start processing a report in the UI thread as you may want the user to see a loading screen with an update on percentage completed. In this instance you would spawn a thread, update the UI every n seconds and wait for completion.
The BattleShots game architecture follows a similar approach. When the android Activity is initially created we create two objects.
- The Updater
- The Renderer
The Updater handles all game logic such as checking if the user pressed on a square, rotating the target reticle, animating a message on/off screen.
The Renderer handles drawing all objects to the screen.
We don't want to merge the above into one big routine as the frame rate will drop severely for devices that take a long time in the updating part.
Activity State
An android Activity has several states. See Android Activity Lifecycle for all its states (there is a good diagram on that page). The ones we are interested in are:
- onCreate
- onPause
- onResume
onCreate we create a new OpenGL based view GLSurfaceView which is similar to a normal xml based view except that it expects us to render everything. Secondly we create The Renderer instance referred to above. Finally we create The Updater referred to above. Think of this event as the user starting a new game so we have to regenerate all our rendering and game logic.
onPause when the user opens a new app, goes to the home screen, receives an incoming call etc. We hijack this event to stop our updater thread from running, this conserves battery life (as we don't have a thread spinning away) and it also means the game doesnt continue updating, effectively pausing it. Basically any time our UI goes away.
onResume when the user returns to our app and it is still in memory (not been garbage collected). We hijack this event to resume our updater thread, this retains the state as we are not re-creating the objects over and over again. Basically any time our UI comes back after using it previously.
The Updater (Update Loop)
The updater (referred to in the game dev world as Update Loop or Game Loop) handles all game logic as previously stated. It has two purposes.
- Provide a list of drawing commands to the renderer
- Notify the UI thread of events e.g. user fired at a square
The class com.pterodactyl.battleshots.views.BoardGameUpdater is where you want to look for its implementation. It implements the Runnable interface which means it is intended to be run by a thread at some point. What we actually do in the classes run() method is force an infinite loop when the thread starts so the updater continually runs. The loop can be broken by setting the running flag to false.
Within the loop there is code to handle the number of updates per second. We don't need the updater to run at 1,000,000 times a second and the more we can sleep the thread the more battery life and cpu we save. Currently the updater thread runs at a maximum of 30 updates per second as defined by the MAX_UPDATES_PER_SECOND variable in its class. The logic within the loop handles the three following instances.
- Hardware is fast - sleeps the thread after every loop to meet the 30 updates per second rate)
- Hardware is just right - continually loops with no sleeping
- Hardware is slow - it forces several updates without sleeping and without pushing updates onto the render thread as it tries to play catchup
Within a single update loop the class does four things:
- Updates Game Objects
- Triggers Events
- Create Drawing Commands
- Send Drawing Commands To Renderer
Update Game Objects the game state is updated every cycle. It creates objects for each UI instance e.g. a boat, a square, a user icon, text etc. and updates their state. Some common updates are:
- Update the target reticle rotation value (so it spins)
- Changes the easing value of a text background (so it animates up and down)
- Calculates the size and position of the checkers based on screen width/height
- Calculates the size and position text
- Calculates the size and position of splashes and explosions
Triggers Events calls any event listeners for events in the game such as a user pressing the fire button.
Create Drawing Commands creates a single drawing command (which a class that wraps up OpenGL drawing commands). It creates objects for each UI instance and uses their state from above to position, draw, colourize etc. Some common drawing commands are:
- Load a splash texture, position it on screen and draw it
- Load a background texture, repeat it across the entire background and blend it with a blue gradient
- Draw a checker using native quads and colour them in
Send Drawing Commands To Renderer passes the above commands to the renderer. Whilst this sounds easy enough it is one of the main reason's why the renderer and updater are broken into separate components. Because updating and rendering are done independently on separate threads, for us to pass information from the updater to the renderer we need to do it safely by locking the renderer and updating its command list. Locking is quite a slow process so it is only done once at the end of an update cycle.
The Renderer (Render Loop)
The renderer is quite dumb. For each rendering cycle (an infinite loop controlled by OpenGL) it locks the Drawing Command list, iterates through and draws them to the screen, finally unlocking the list. This allows for the UI to be drawn very quickly as very little logic (apart from translating coordinates or scaling) is done on this thread. This is how we achieve a high FPS.
The Update Loop + Render Loop = Game On
I have put together a diagram below to try to explain the above process visually. Hope it helps.

Saturday, 5 January 2013
BattleShots Drinking Game
Been quiet recently and as such I usually pick up a project or two I am interested in. So here comes BattleShips Drinking Game for the Android Market. The game concept is around a physical drinking game we have played on occasion so what could be better than sharing this with other people and developing and Android App in the process.


I have worked on the Android platform previously so it was nice to work on a game which some great visuals and interaction. I designed and developed the user interface, user experience, sprites and assets used in the game and got to grips with OpenGL ES 2.0 framework for hardware rendering on the Android. Although the game is two-dimensional it was nice to see the full 3D architecture of OpenGL and how I could use this in future projects.
The game makes use of several custom shaders for rendering performance and some real nice visuals. Font's appeared to be the big issue on the Android so I went down the route of implementing a Bitmap Fonts helper library with a Glyph mapping so that spacing could be managed between characters. Overall I think my implementation works really nicely and the text stands out as a key part of the Game. To see just how I implemented Bitmap Fonts in OpenGL ES 2.0 take a look at the source at BattleShots Bitmap Fonts Source the source is well documented so it should be easy to traverse. The bitmapfonts.xml file can be found there too.
Another key element of the design was that I wanted to make the game performance a crucial factor. I felt this would be handy in future projects so BattleShots is quite heavily optimized (perhaps overly so). This is discussed in more detail in a separate article I wrote on BattleShots Game Architecture please go take a look.
Finally came the marketing side, so I quickly put together a site which advertises BattleShots Drinking Game, I think it does a good job of conveying the BattleShots message.
Working with the Android framework has been a nice change again as well as following test driven development practices throughout the development of the game, this really made it easy to quickly get iterative builds up and running for users to see.
Be sure to go download the App and play with a few mates!
Sunday, 1 July 2012
XBMC Hockey Streams
So I'm a hockey fan, that is "Ice" Hockey. I also love the awesome XBMC project. So what better use of my time would there be than building a plugin to view hockey streams on the XBMC? In steps XBMC Hockey Streams a plugin developed by me to watch hockeystreams.com content via the XBMC. The plugin is built using Python and the XBMC libraries to access the hockeystreams API for content. I should point out I am not affiliated or paid by hockeystreams.com this is purely a plugin project that uses their content. As such it's seen high demand by the hockeystreams community and I hope to continue to maintain this project into the future, check out the project page on https://code.google.com/p/xbmc-hockey-streams/ now.


Wednesday, 14 March 2012
Do It Yourself NAS
I recently set about piecing together my home network from scratch due to moving into a new home, with this came a short-sighted purchase, the Synology DS211j. The intent of this article is not to bad-mouth this device, but point out that it was not fit for "my" purpose and supposedly many others in my situation.
This made a huge difference to my results and as a result I get much snappier file transfers. In summary you can build a cheap NAS for your storage needs, I feel I have the FreeNAS bug now so there may be more DIY builds coming soon!
I have a lot of media, maybe not the most but still plenty consisting of photo's, home videos, music, TV shows and movies. Initially I managed to cram most of this onto the DS211j which was setup with 4TB of space as well as nightly backups to a seperate disk. But with the recent decision to move every dvd and bluray I own off their shelves and onto the NAS I quickly ran out of space.
At £140 (time of writing) the Synology DS211j is great little work horse for those who don't want to get their hands dirty. But seeing as I didn't mind building a system myself I figured I could greatly reduce this price, especially when you consider moving to pre-built NAS devices with more drive capacity quickly inflates this price into its £1000's (before you even add hard drives).
So my task was simple, I would build my own with the following in mind...
- Components must be cheap (not the cheapest but were not talking about a gaming PC here!)
- It must be low power consuming, most pre-built NAS quote very low running wattage and I don't want to lose any saving I made shelling out money on the electricity bill
- Support for at least 8 hard drives giving me a total of 24TB
- Be able to perform backups
- Provide some level of redundancy for hard drives
So with the above leading the way I set about picking a hardware/software combination that would theoretically be fit for purpose. The following is what I chose for the build along with reasoning...
- Casecom KB-7760 ATX Case £12.51 from Ebuyer
- 11 potential hard drive bays
- Did not need a fancy looking case as it would be tucked away
- Asus AT5NM10T-I £70.08 from Europc with 4% cashback through quidco
- Low power consuming motherboard specs here
- Intel Atom D525 processor built in, low power and ample raw processing power for a NAS
- 4 SATA II ports
- Gigabit Lan
- PCIe expansion port
- Huntkey Jumper 80+ Gold Certified 300w PSU £43.38 from ebuyer
- I was considering a 12v 120w PicoPSU but at boot when all the discs spin up there was potential that the little PSU wouldn't be able to power 8 drives and a motherboard with processor.
- Don't go cheap with a PSU you get the majority of your energy saving and efficiency from here
- 2GB SODIMM DDR3 Ram £10.79 from Crucial with 7% cashback through quidco
- SATA II 4 Port PCIe Card £23.99 from ebay
- Add's 4 SATA II ports to my build albeit capped at the maximum throughput allowed by the PCIe port (500MB/s), still with this limitation you would be hard pressed to max out the PCIe ports bandwidth over a network, this only really becomes an issue transferring between drives on the same machine but since this is "Network" Attached Storage it is a non-issue.
- Didn't need any hardware raid support (would leave this to software) otherwise buy something more expensive
- 2GB Pen Drive £3.99 from dabs
- To hold the operating system
- FreeNAS operating system
- Provides a web based GUI
- Support for ZFS file system which includes snapshots, end-to-end checksumming and recovery/redundancy when pooled.
- Allows me to use software RAIDZ so it is independent of the hardware making future upgrades easier.
- Large community for support
- Has been around a while and is mature
Making a grand total of £164.74 for a potential 8 bay NAS! A quick Google tells me I would be lucky to get the low end models that support 8 bays for under £500.00 and these have severely reduced hardware specifications meaning you forfeit some functionality such as software raid, snapshots etc. So time to get down and dirty with the build, the following is a series of snapshots taken during the process, if you need help piecing a computer together from scratch I suggest Google is your friend.


So with the build ready I needed to set-up FreeNAS, following the instructions on their wiki I managed to install FreeNAS to a USB drive and boot into the FreeNAS console. Everything appeared to just work, it configured all my network settings automatically (I was connected to my network via Ethernet) and told me my device was available at 192.168.x.x. So using another PC I logged into the web GUI for FreeNAS and again after following more instructions on their wiki I had assigned a volume to my hard disk, setup a dataset for this volume and shared it with my windows clients. All was well.
Now for testing. A speed test was first on my list, I used the intel nas performance toolkit to measure throughput, to be completely honest this program is overkill for what information I wanted but it does the trick. The following is breakdown of my initial tests when compared to the DS211j that I own.
| Test Name | DS211j | DIYNAS |
|---|---|---|
| HD Video Playback | Throughput: 32MB/s | Throughput: 40MB/s |
| HD Video Playback x2 | Throughput: 32MB/s | Throughput: 40MB/s |
| HD Video Playback x4 | Throughput: 30MB/s | Throughput: 36MB/s |
| HD Video Playback and HD Video Record | Throughput: 27MB/s | Throughput: 28MB/s |
| File Copy To NAS | Throughput: 18MB/s | Throughput: 30MB/s |
| File Copy From NAS | Throughput: 32MB/s | Throughput: 42MB/s |
| Directory Copy From NAS | Throughput: 28MB/s | Throughput: 37MB/s |
| Directory Copy To NAS | Throughput: 16MB/s | Throughput: 26MB/s |
To say I was a little disappointed with these first results is true but never fear. I figured there may be some "tweaking" involved to get the most out of FreeNAS (it is designed to work on hundreds of pieces of hardware). So I had a play around with some of the kernel settings relating to buffers and zfs options and came to a trial-and-error solution that works for my hardware.
Adding the following settings to the loaders part of the FreeNAS GUI worked wonders.
vm.kmem_size 1
vm.kmem_size_max 1
vfs.zfs.prefetch_disable 0
And the new results following this change?
| Test Name | DS211j | DIYNAS |
|---|---|---|
| HD Video Playback | Throughput: 30MB/s | Throughput: 65MB/s |
| HD Video Playback x2 | Throughput: 30MB/s | Throughput: 45MB/s |
| HD Video Playback x4 | Throughput: 30MB/s | Throughput: 41MB/s |
| HD Video Playback and HD Video Record | Throughput: 30MB/s | Throughput: 36MB/s |
| File Copy To NAS | Throughput: 30MB/s | Throughput: 38MB/s |
| File Copy From NAS | Throughput: 30MB/s | Throughput: 66MB/s |
| Directory Copy From NAS | Throughput: 30MB/s | Throughput: 61MB/s |
| Directory Copy To NAS | Throughput: 30MB/s | Throughput: 32MB/s |
This made a huge difference to my results and as a result I get much snappier file transfers. In summary you can build a cheap NAS for your storage needs, I feel I have the FreeNAS bug now so there may be more DIY builds coming soon!
Subscribe to:
Posts (Atom)